Whisper

Tuesday, December 23, 2014

SNOWFLAKE GIFT BOX USING NOVEMBER'S MY PAPER PUMPKIN


November's Paper Pumpkin was one of my favorites!  The beautiful Snowflake Cards with tags were just gorgeous!  But I saw some other potential ideas to make using the items from the box!  Paper Pumpkin arrives once a month with an ongoing subscription.  They include a variety of cards or projects - each is different every month.  You'll need to have your own adhesive on hand to put your projects together, everything is in the box & the instructions too!  Each month Stampin' Up! publishes a video on YouTube to watch the project being made.

Here is NOVEMBER'S Paper Pumpkin Video: 


Slide the box inside! Easy-Peasy!


I turned the card into a belly band and it slipped over a box made out of a single sheet of card stock. Tucked inside is a gel sanitizer snowman tag.  You can view my video to make the gel sanitizer! 


Do you love this idea? Are you a Paper Pumpkin Subscriber?  Let me know if you would like to get a  monthly surprise in a box !

Visit mypaperpumpkin.com to find out more!


Friday, November 28, 2014

WINTER WEDDING CARD


Our new challenge this week at THE PAPER PLUNGE is "Focus People!" We are highlighting a sentiment/greeting.  I have a winter wedding and will be giving this to the happy wedding couple!

Here is the deets:

Ever hear the expression, "Actions speak louder than words"? Well, this week's challenge is to make the words speak louder than anything else.  This week we would like to see what you can do by making the sentiment the main focus of your project. 


Another feature of this card is the moving hearts!  I punched out hearts from various papers- that Glimmer & Shimmer & Shine!  You can watch them dance behind the Window Sheet & Sentiment.

Stamp Set:  Big News
Ink:  Stazon Black
Card Stock:  Whisper White, Gold & Silver Glimmer, Gold & Silver, Dazzling Diamonds, Window Sheet
And More:  Pearls, Filigree Embossing Folder, Framelit Squares, Corner Rounder, Small Heart Punch

TIP: Emboss the front, then use the Square Framelit to make a center opening. Stamp Happily on the front panel.  Stamp Happily on a 3 1/2" x 3 1/2" window sheet. adhere behind the front panel- lining up the greeting. 


Wednesday, November 26, 2014

SNOWMAN WITH GEL SANITIZER & VIDEO


There are many craft show ideas and here is one more with a video!  These Snowmen are made with Bath & Body Works Hand Gels.  What a cute idea for cold and flu season! I whipped out several in a short time.  The video also shows how to make 5 bases using 1 sheet of 8 1/2" x 11".

Many of us are visual learners so I hope the video helps you to make your own! 


Side View


Bath & Body Works Hand Gel 
Base Pattern

almost 2" x 8 1/2"

Score 3 7/8", 4 3/4", 7", 7 7/8"

Stampin' Up! Products Used:

Project Life Journal Pen, Angle Tag Topper Punch,  3/4" Circle Punch, Flower Punch, Seam Binding Ribbon, Fringe Scissors
Card Stock:  Basic Black, Whisper White, Pumpkin Pie, Dazzling Diamonds Paper

Non- Stampin' UP! Products

6 mm Gogglie Eyes
Bath & Body Works Hand Gel


Monday, November 24, 2014

DESKTOP CALENDAR PROJECT & Stampin' Up! Online EXTRAVAGANZA


We made these 2015 desktop calendars in our November Classes.  We used cards from Project Life by Stampin' Up! They turned out to be a hit with all the gals. The pattern is shown below for you to make one too!


Backside with paper clip for notes.


Calendar front 


Calendar layout


Desktop Calendar Pattern

Stamp Set:  Project Life Point & Click
Ink:  Tangelo Twist
Card Stock:  Basic Black, Melon Mambo, DSP- Back to Black
And More: Everyday Adventure Project Life Cards


Friday, November 21, 2014

NO SHAVE NOVEMBER


JOIN US AT THE PAPER PLUNGE FOR A NEW WEEKLY CHALLENGE!
THIS WEEK'S THEME IS


How about this QUICK, SIMPLE CLEAN card?  My sons for the past few years have participated in NO SHAVE NOVEMBER and grew mustaches.  I made them this card and added on the inside..... "I can't wait til December! Love, Mom".  They are both handsome men (in my humble opinion as their mom) and the mustache's are just creepy to me.  I have proof! just wait & see............


The back story of what I am about to share...


For YEARS I have asked my family for photos and to have a family photo.  My husband HATES  no DETESTS pictures being taken of him.  He does cooperate, but reluctantly!  


A few years ago, we took the whole family to Disney during our Anniversary Week.  My husband and I stayed an extra day & my oldest son picked us up from the airport. When we got home, all the family was at our house.  I thought that it was strange, seeing we just spent a week together.  BUT after walking in and seeing WHAT they did for an Anniversary Gift, words can't describe it or our reaction!  


Every picture in our house was switched out for NEW (AWKWARD) FAMILY PHOTOS. Have you seen those cards at Target?  Well they had a photo shoot with their creepy mustaches, and ugly sweaters, and coordinating sweatsuits, and off-stylin' hair DON'TS!  If there was a frame, there was a new photo. Over the fireplace, on the walls, in my office, on the bookcase.... EVERYWHERE! 

We will never, ever forget that day, it was totally awesome!  Here are a few of the 100+ photos.


This year for our Anniversary, we had a REAL Family Photo Shoot.  Here is our current family photo!


Oh, back to the quick simple clean card............  No Shave November!


Stamp Set:  Day to Day (Project Life by Stampin' Up!)
Ink:  Sahara Sand, Chocolate Chip
Card Stock:  Whisper White (note cards), Chocolate Chip
And More:  Woodgrain Embossing Folder, Mustache Framelit


Monday, November 17, 2014

LET IT SNOW!


We got our first measureable snow over the weekend & I got out my Little Letters Thinlits! AND I love Snowmen! then sprinkle the card with Frosted Sequins and you got yourself a FUN winter card!!!!  I evenly spaced the Thinlits leaving room for the snowman and ran it through the Big Shot.  Boy the MAGNETIC PLATFORM made the project so easy! The letters stayed in place on the card front as I ran it through! 


Ink:  Chalk Marker (Let it...)
Card Stock:  Pacific Point, Basic Black, Tangelo Twist
And More:  Circle Punches- 1" & 1 3/8", Pennant Punch (nose), Cupcake Punch (eyes), Baker's Twine Cherry Cobbler, Frosted Sequins

TIP:  I used liquid glue to adhere the Sequins. Place a dot of glue on the paper with a toothpick and then put down the snowflakes and silver rounds on top of the glue. Glue dots also work great!


Saturday, November 15, 2014

WINTER THEME CARD HOLIDAY HOME


We have the best samples in our Catalogs to draw inspiration from and to CASE (copy & share).  Although I have changed up a few things- you can view the sample on page 16 in the Holiday Mini Catalog.  I added the beautiful DSP- All is Calm for background paper and Spritzed the snow to make it glimmer. 

We made these during our November Card Class.  The theme was WINTER.


Check out the BUNDLE on page 16 to get a 15% discount when you purchase the Holiday Home Stamp Set and the Homemade Holiday Framelits


http://www.stampinup.com/ECWeb/ProductDetails.aspx?productID=137631
137631 Holiday Home Stamp Set & Homemade Holiday Framelits


Stamp Set:  Holiday Home
Ink:  Pear Pizazz, Lost Lagoon
Card Stock:  Whisper White, DSP- All is Calm, Silver Glimmer Paper
And More:  Decorative Dots EF, Homemade Holiday Framelits, White Cotton Ribbon, Vanilla Shimmer Spritzer, Heart Punch

Monday, November 10, 2014

MORE GIFT BAGS & A VIDEO!


I've made a couple more gift bags and a video to share. The first bag is made with the Designer Series Paper All is Calm from the Holiday Mini Catalog (view catalog on my left side panel).  I added a Snowman Tag and some Silver Glimmer Stars to decorate the front.  The bags can stand alone with the gorgeous papers, but I love to dress them up and add a piece of my "h'art". Punch ART that is!!!!


The next bag is made using Flowerpot Designer Series Paper. I added some punched flowers with a Delicate Doily and a beautiful Faceted Button that was colored using Blendabilities.


Fun Flower Video is found at the top of the page under VIDEOS.

You can view the Gift Bag video  and start making your own gift bags!


Gift Bag from October 31, 2014 Post


Friday, November 7, 2014

BOBBLE-HEAD MOOSE CARD & VIDEO

Ready for our next weekly challenge at The Paper Plunge?  It's time to Punch Your ART Out!


How cute is this MOOSE?  I checked Pinterest for Moose Punch Art & was inspired to make one by tweaking several designs that I liked.  The fun twist is that it's a BOBBLE HEAD MOOSE!  Watch my video and see how to make one too!  We're here to inspire you to Punch Your Art Out!  

Check out Amanda & her team to see what they Punched out this week at The Paper Plunge


Video to make Bobble Head


He Wiggles to the right or left!


MOOSE TEMPLATE

Stamp Set :  Gorgeous Grunge, Alphabet Rotary Stamp
Ink:  Momento Tuxedo Black, Baked Brown Sugar, Real Red
Card Stock:  Whisper White, Baked Brown Sugar, Real Red, Pear Pizzazz, Sahara Sand
And More:  Filigree Embossing Folder, Fringe Scissors, Chalk Marker
Punches:  Owl Builder, Small Oval, 1/4" Hand Punch, 1/2" Circle, 2 1/2" Circle, 2 3/8" Scallop Circle, Little Label Punch Pack, 

Card Base: Whisper White 4 1/4" x 11" Score @ 5 1/2"
Embossed Layer:  Whisper White 4" x 5 1/4"
Fringe Frame: Basic Black 3 1/4" x 3 1/4", Whisper White 3 1/8" x 3 1/8"
Moose Frame:  Basic Black 2 1/4" x 2 1/4", Whisper White 2 1/8" x 2 1/8"
Banner 1/2" x 3"


Monday, November 3, 2014

BLOOM WITH HOPE


All Neutrals- These make lovely Sympathy cards for those occasions when you need them. It has vertical banner layers of  lace, ribbons, paper, burlap & even a gift bag that is trimmed down. I added a few splatters to soften it. 

Stamp Set:  Bloom With Hope, Dictionary
Ink:  Crumb Cake, Sahara Sand, Soft Suede
Card Stock:  Crumb Cake, Whisper White
And More:  Vanilla Seam Binding, Burlap Ribbon Venetian Lace, Staples, Aqua Painter. Chevron Gift Bag


Friday, October 31, 2014

FOUR FEATHERS GIFT BAG

ANYTHING BUT A CARD IS THIS WEEK'S CHALLENGE AT THE PAPER PLUNGE!


I chose to make a gift bag using the Designer Series Paper- Back to Black.  It is one of those packs that you just can't go wrong with pairing it with a dynamic POP of color.  I thought Calypso Coral was the look I was going for. The Stamp Set Four Feathers can be bundled with the Feather Framelits for 15% off.  I love when I don't have to fussy cut out those feathers!

The Gift Bag is made with a 12" x 6" piece of paper.  You can make 2 with one sheet of 12" x 12". The DSP pack comes with 12 sheets, 6 designs, 2 sheets each,  double sided prints to choose from.

If you would like to see a video on how to make the Gift Bag, mention it to me in a comment.


Stamp Set:  Four Feathers, Good Greetings
Ink:  Momento Black
Card Stock:  Calypso Coral, DSP- Back to Black
And More:  Chevron Ribbon, Calypso Coral Seam Binding, Candy Dot Brads, Feather Framelits

Please click on over to The Paper Plunge to see what the other designers made & if you have something other than a card..... Post it for us to be inspired by YOU!

Monday, October 27, 2014

FESTIVE FALL THANKS


My leaves are continually falling off the trees in my yard-  but I am so happy that Fall and all it's beautiful colors has lasted almost to November this year!  I am NOT looking forward to the raking of the yard! The center oval is Seasonally Scattered - a stamp set from the Holiday Catalog.  I used Stampin' Up!s markers to color the gorgeous leaves and swirls.  I also added some Dazzling Diamonds Glitter to the individual letters and acorn from Autumn Accents. The background is a leaf from the set- Stippled Blossoms. 


Stamp Set:  Seasonally Scattered, Stippled Blossoms
Ink:  Hello Honey, Tangelo Twist, Cherry Cobbler, Blackberry Bliss
Card Stock:  Blackberry Bliss, Whisper White
And More:  Dazzling Diamonds, Autumn Accents, Whisper White Satin Ribbon

Last week I posted my Creative Blog Hop and this week I am tagging HELEN from Blue Dahlia Designs to be the next designer on the Creative Blog Hop. She is busy creating consistently for a weekly blog hop- Coloring Down the Lines  (which posts on Wednesdays)  and part of the Challenge  Team- The Paper Plunge ( which posts on Friday).  Her hand to paper is elegant and she has become a regular place for me to get inspiration from.  I hope you stop by her blog and see her designs.


Friday, October 24, 2014

APPLE BOX - CURVY KEEPSAKE BOX


I Love the Curvy Keepsake Thinlits & used them to make these Apples. This was part of September's Card Class - we make 3 cards and 1 project.  We filled them with Caramel Apple Chewy Candies! MMMMMM!  The Wood cutouts are from the Holiday Mini Catalog. 


Stamp Set: A Round Array
Ink:  Real Red, Momento Black
Card Stock:  Real Red, Old Olive, Whisper White
And More:  Scallop Circle Punch, Curvy Keepsake Thinlit, Wooden Accents, Linen Thread, Pear Pizzazz Chevron Ribbon, Circle Punch


Wednesday, October 22, 2014

SYMPATHY CARD WITH FLOWERING BUDS


This crisp card was made as a sympathy card, but can easily be used for so many occasions.  I made several last month, and unfortunately had to use them for some dear friends going through painful losses.  Layering on White is so elegant with the Stampin' Markers on the Hey There Buds Stamp Set. I also used the Dazzling Diamonds to add some shimmer to the flowers. 


Stamp Set:  Hey There Buds
Ink:  Melon Mambo, Pink Pirouette, Daffodil Delight, Garden Greeen
Card Stock:  Whisper White, Melon Mambo, Basic Black
And More:  White Satin Ribbon, Dazzling Diamonds, Decorative Dots Embossing Folder

Monday, October 20, 2014

FALL CONTINUES and the CREATIVE BLOG HOP

Creative Blog Hop

Thank you Amanda for TAGGING me in your Creative Blog Hop last week.  I have been following Amanda for several years and watched her business grow as a Stampin' Up! Demonstrator. She has awesome ideas for expanding her creativity and sharing it.  I am happy to be on her Design Team at The Paper Plunge.   She also cheered me on when I started my blog a few years ago.


1. What am I working on right now?

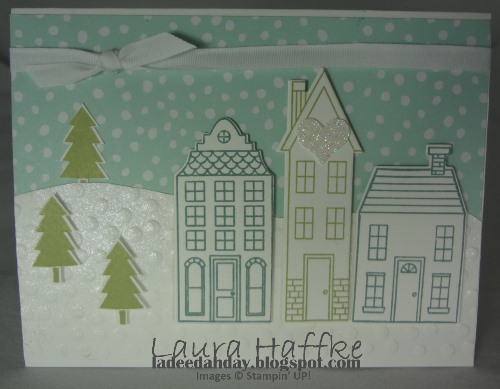
That's simple.... I have a class this Friday featuring a project that I posted a few weeks ago. It's the Winter Tag Collage.  Most of my classes are monthly.  I have 2 classes that make the same projects- 3 cards & 1 project- usually involving candy!  I add a specialty class when someone requests it. This time we will be putting together the tags during class.  I prep ahead and will have an assembly line waiting for them to stamp, punch and glue! 

I procrastinated on this blog post- (not just because I had 2 days out of town, several house showings & the grand kids a couple of times & LIFE!) I decided to make a Belly Band for a really cute Fall Tissue Package and a new 3D Pumpkin. 


2. How does my work differ from others in my genre?

I'm not sure if you can reinvent the wheel, but I decided to take that wheel and make it again. After all, we are creating with PAPER! Sometimes it's CASEd (copy and share) with a few changes. Sometimes it's original (or I think it is- meaning- I don't recall seeing it before!). I switch up styles from time to time. I go from clean & simple to vintage then to sparkly & frilly & LOTS of punch art. 

3. Why do I create what I do?

I like to smile and crafting takes me to that happy place! Picking out paper and designing a card or project brings me joy and then letting someone else know you are thinking of them is like sharing a piece of me and a piece of my heart. The best therapy I know!


How cute is that handmade owl pin cushion?  It was given to me from a very creative friend- Brenda S. Look how she inspired me to make the Owl Belly Band!  

4. How does my creative process work?

I have several ways.
1.  It POPS into my head at crazy times and I jot down the idea & execute it.
2.  It POPS into my head and I go to make it and it turns out SO DIFFERENT than I imagined!
3.  It is inspired from others.  I don't spend a lot of time on Pinterest, or other social media sites, but I have a list of my favorite blogs to visit and we have a great resource as a demonstrator for Stampin' UP! called Stampin' Connection.  SC has thousands upon tens of thousands of designs to look at that other demonstrators have graciously shared.  


Yep.... my creative process at work!  


Pumpkin is made with strips of paper measuring 1 1/2" x 4-6 1/2".  They have a hole punched on each end and then threaded on a dowel.  I made a base with chipboard & covered the bottom with felt. 

Stamp Set:  Good Greetings
Ink: Cherry Cobbler
Card Stock: Daffodil Delight, Chocolate Chip, Whisper White, Old Olive, Variety of Designer Series Paper Stacks- Pumpkin Pie, Tangelo Twist, Cherry Cobbler
And More: Owl Builder Punch


Related Posts Plugin for WordPress, Blogger...